Creating an appealing, functional website can be a challenge, especially without extensive programming knowledge. But for exactly this scenario there are powerful tools like the Divi theme that make the task considerably easier. Divi is one of the biggest page builders for WordPress, winning users over with its friendly interface and versatile design options. In this blog post we show you, step by step, how to create a professional WordPress page with Divi. Whether beginner or experienced user, our guide helps you get the best out of Divi and turn your ideas into a working page on your website.

Creating a WordPress page
First there needs to be a WordPress page on which Divi can be used. To create a page, click “Add New” under “Pages”.
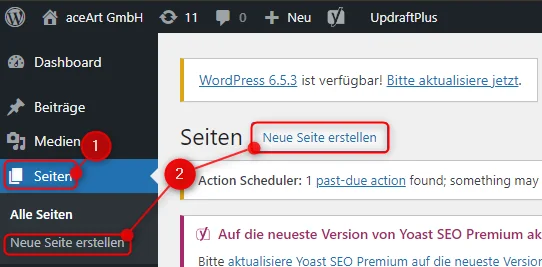
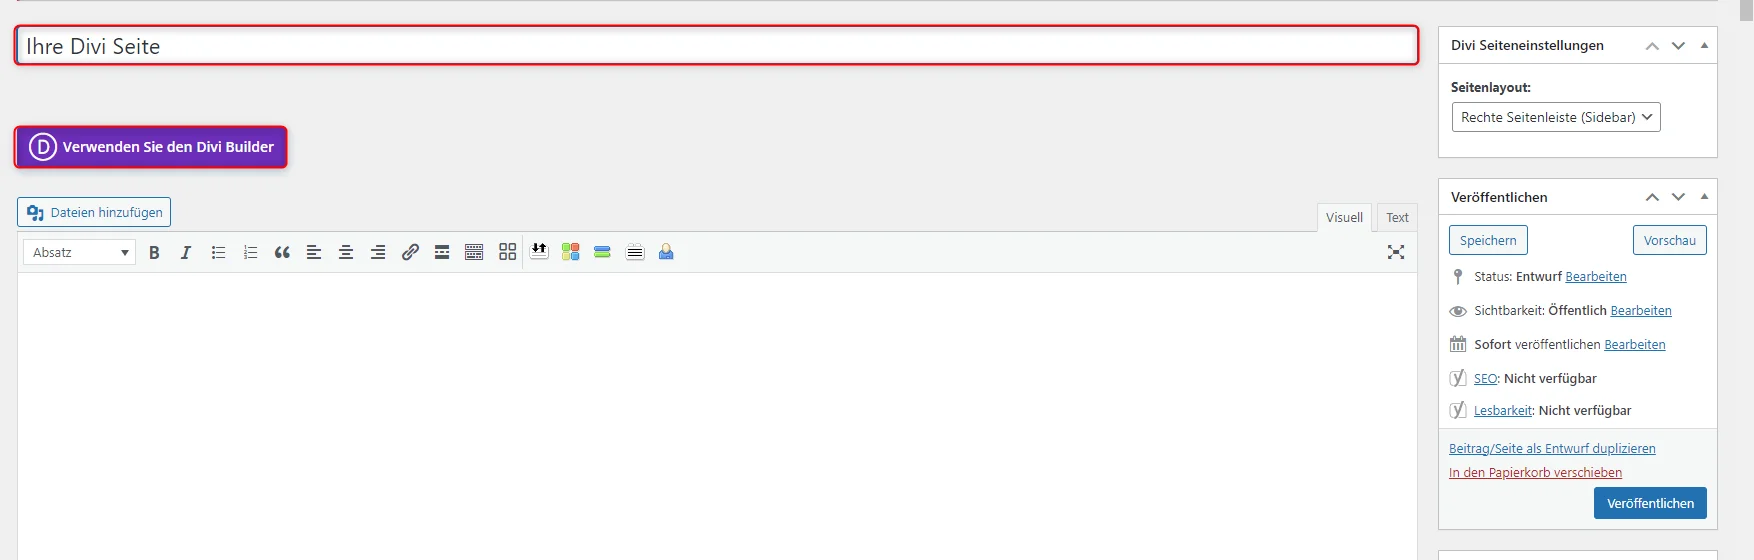
Enter the desired page title. A URL is generated automatically from the page title. To create a custom URL, click “Edit” to the right of the URL.

Meta information
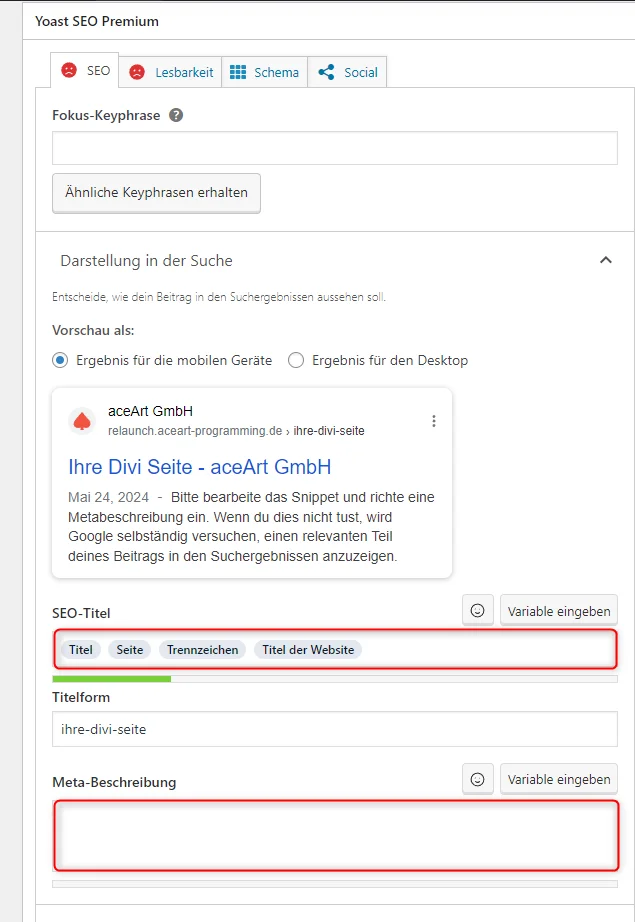
The page’s meta information can be edited with Yoast. You’ll find Yoast by scrolling further down the page to “Yoast SEO”.
Under “SEO title” you can set the title with which your page appears in search engines.
Under “Meta description” you can set the meta description. The meta description is a short description of the page. It is shown in the search results below the SEO title.
Divi Builder
To activate the Divi Builder, click “Use The Divi Builder”.
You now have the choice of building the page structure yourself (BUILD FROM SCRATCH), selecting a template (CHOOSE A PREMADE LAYOUT) or duplicating an existing page (CLONE EXISTING PAGE).
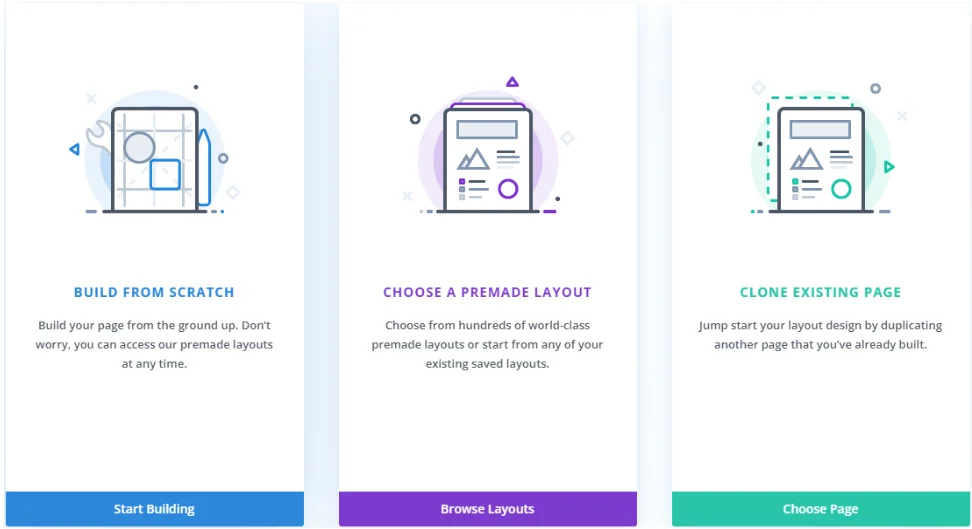
The layouts offer you a selection of ready-made page structures you can adopt. Content and structure can still be changed afterwards.
Duplicating a page makes sense if you want to create several pages with the same or a similar structure. Content and structure can also be adjusted individually when duplicating.
For now, choose “BUILD FROM SCRATCH”.
Sections, rows and modules
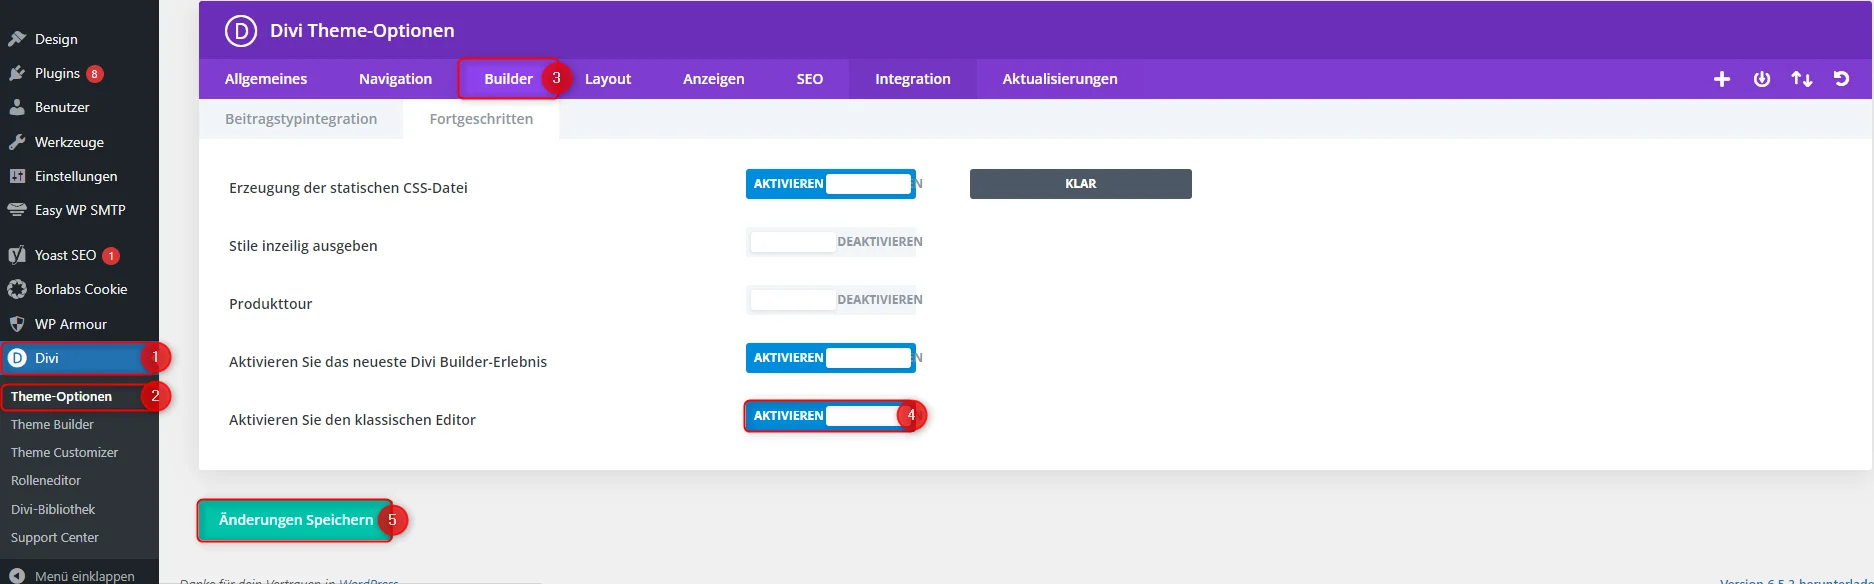
Note: The Divi layout aceArt uses is the classic editor. It first has to be activated in the Divi options as follows:
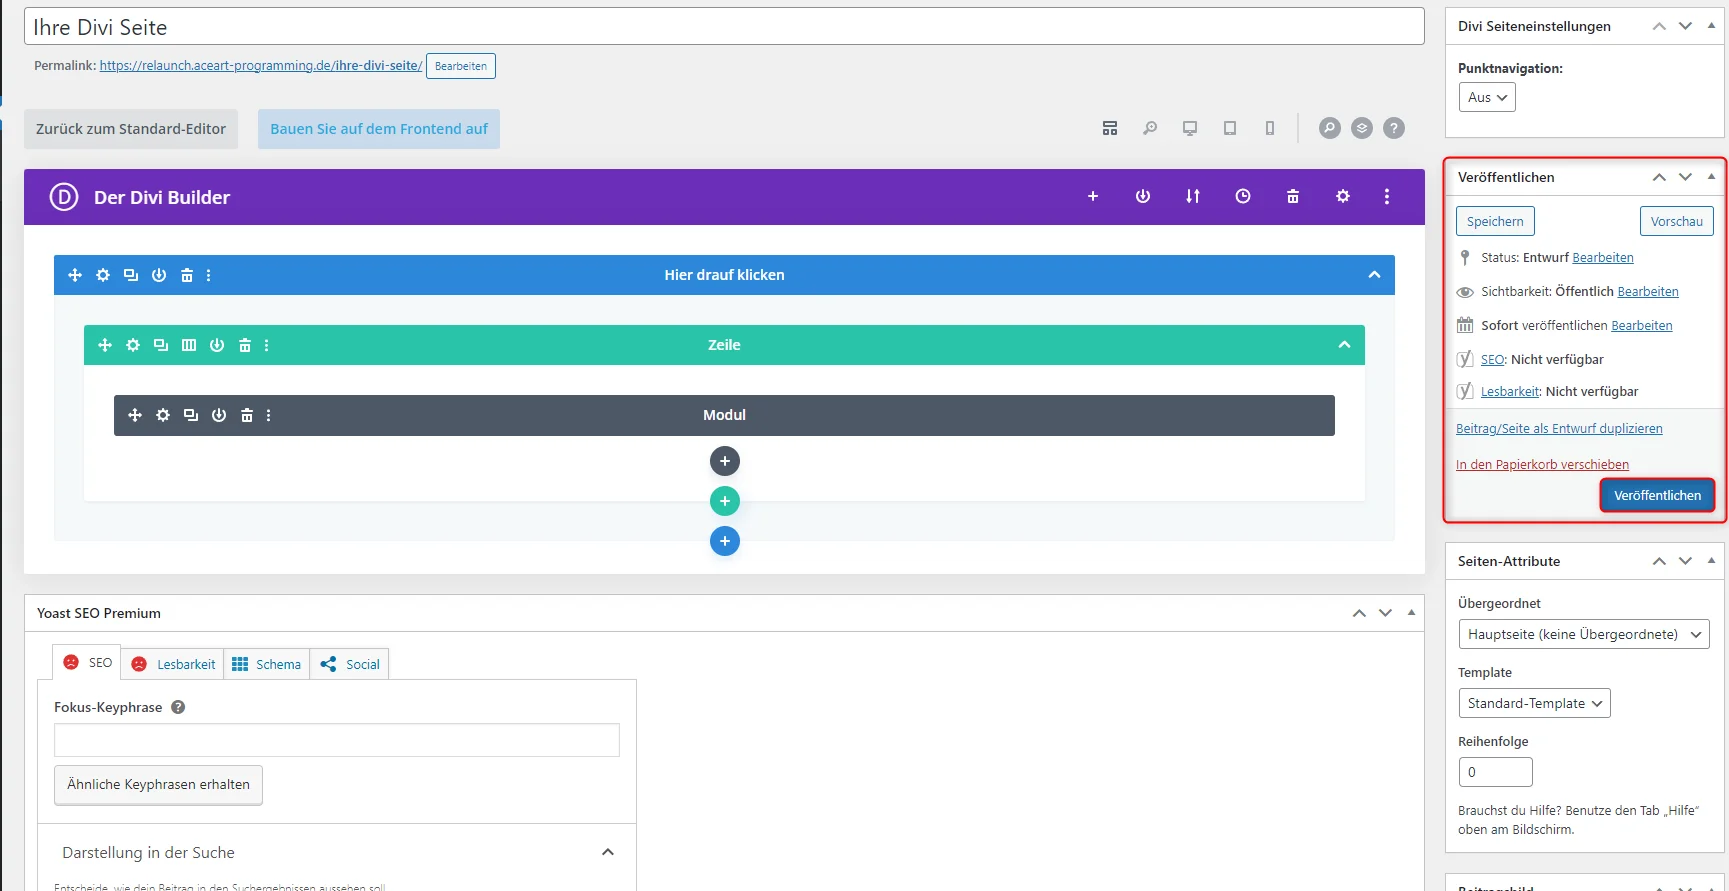
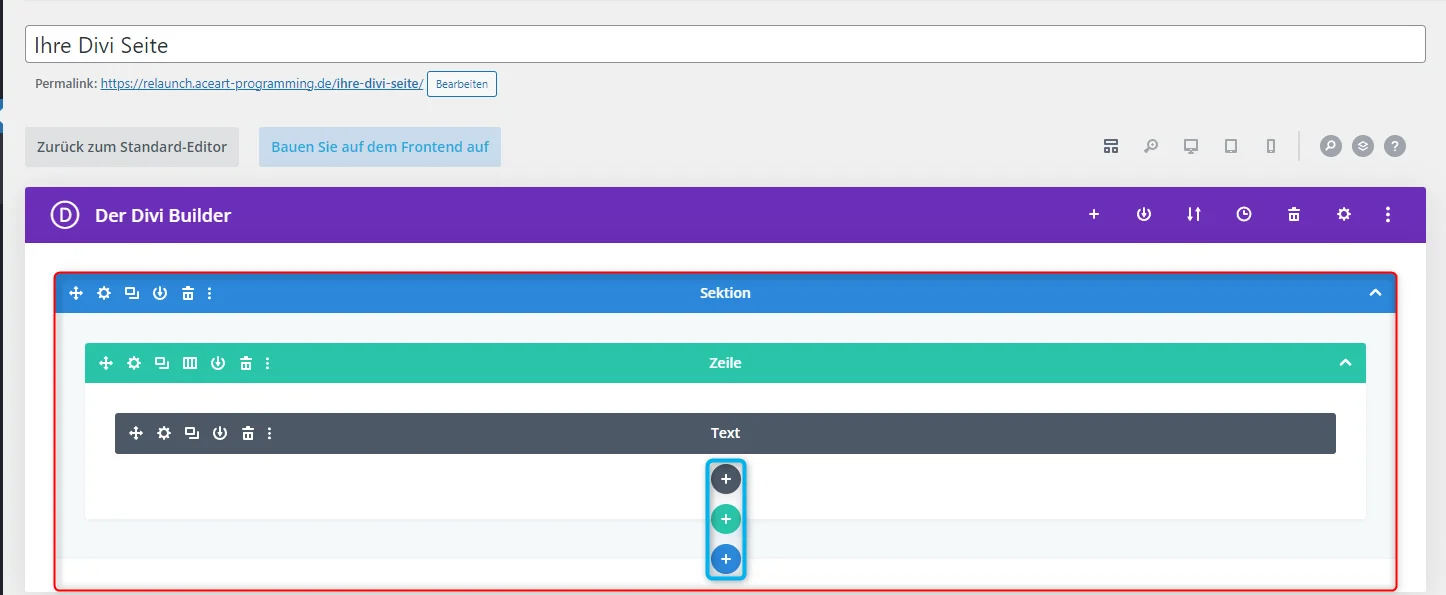
Divi pages are built from 3 different elements:
- Blue → section
- Green → row/column
- Grey → content elements/modules
To insert the various elements, click the + in the corresponding colour and select your desired module/format.
Renaming elements
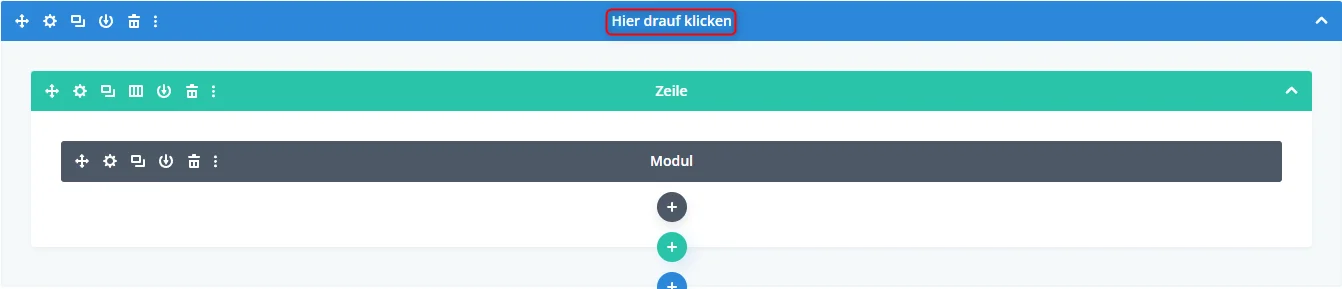
To keep a better overview, you can rename the modules. To do that, click the module’s text field and enter your desired title.
Editing and duplicating elements
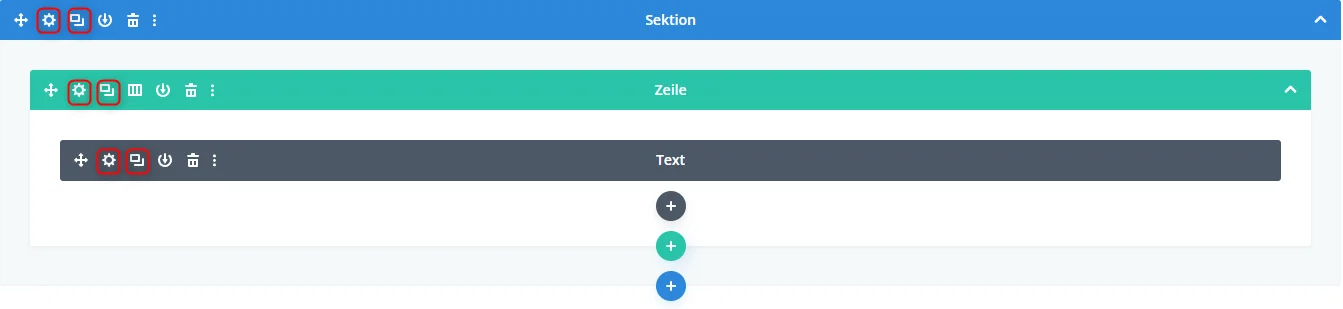
Modules can be edited via the cog icon and duplicated via the two “windows”.
Moving elements
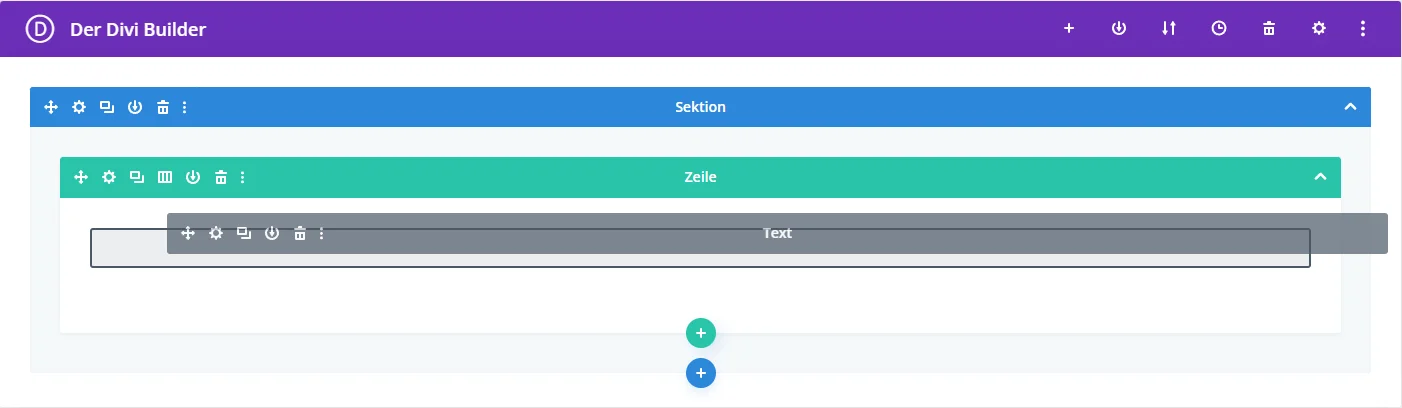
The order of individual sections/rows/modules can be changed via drag and drop.
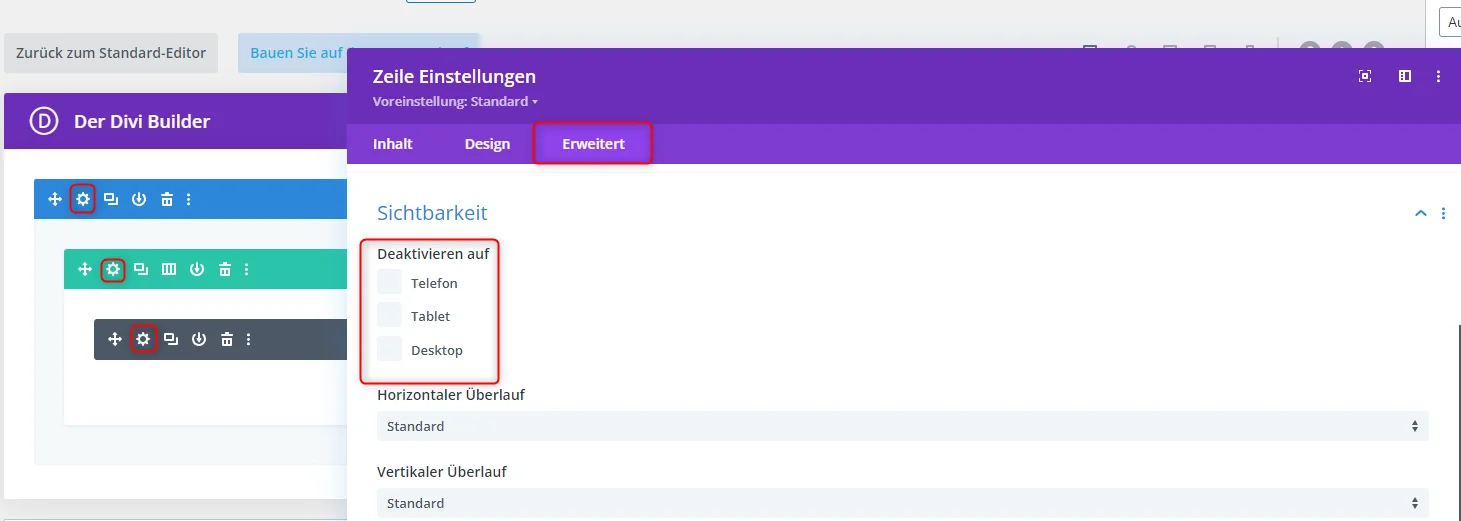
Hiding elements
If you want to hide sections, rows or modules, navigate as follows:
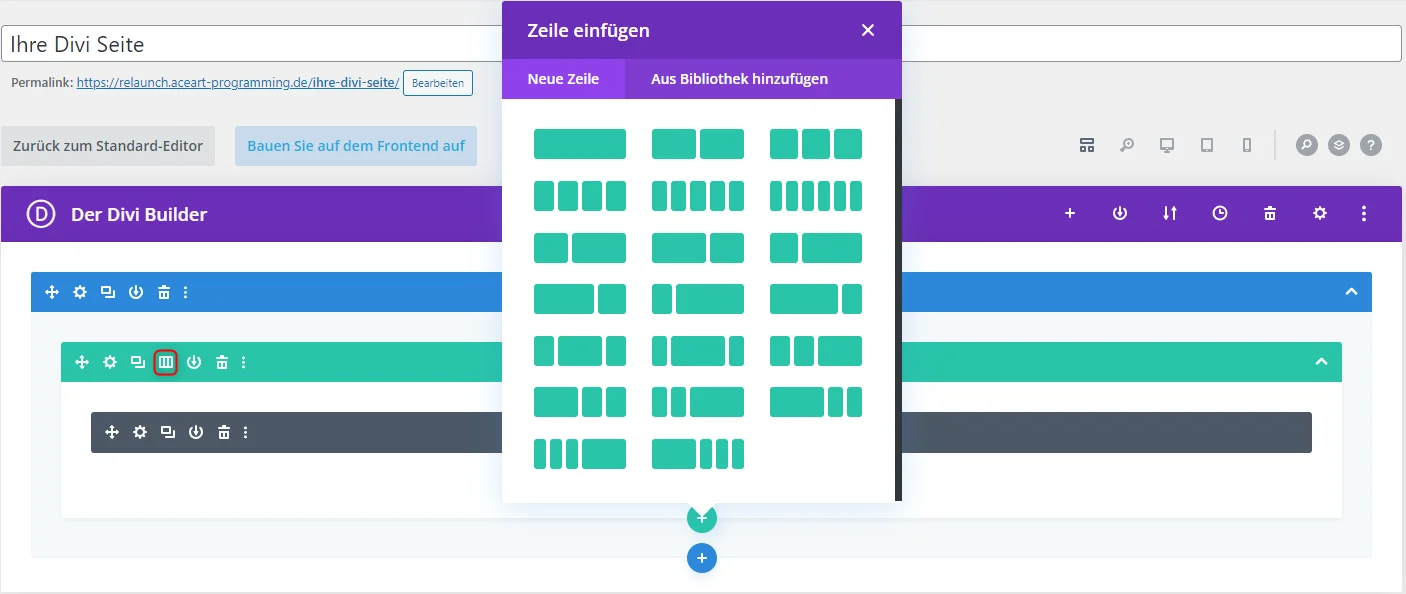
If you want to place modules side by side, for example an image next to a text — you can choose different structures (columns) when creating a row.
Or, on existing pages, select the function to the right of the duplicate button.
Important: when you’re done, you must “Publish” and/or update the page. If the page you’re editing is already published, the “Publish” button becomes “Update”.
You’ll find the button on the right-hand side under “Publish”.